
Introducing our most recent placement student from the Curating Collections & Heritage MA at Brighton Humanities – lovely Lilia Federico. Lilia read anthropology and Women’s, Gender & Sexuality Studies at College of Wooster, Ohio prior to her current MA and comes with a keen interest in historical dress research. Lilia is heading in the curatorial direction career wise but wants to gain a deeper understanding of textile and costume conservation.
She came to us in early May two days a week and has made a close study of one of our study collection 19th C women’s bodices. Lilia has been learning how to mount it under Jamie’s watchful eye and documented her work, which you can read below …
Hello, my name is Lilia! I want to introduce you to a pair of items in the teaching collection here at ZTC, a grey early Victorian bodice and matching jacket.
I have dated the bodice to approximately 1857-1865, the jacket however was modified, I’m approximating in the 1870’s, and the chest inlay, and parts of the sleeves I do not believe are original. There is evidence (see image 6) of sewn over button holes underneath the white lace. Jackets that would have accompanied the bodice originally would have a high neckline buttoned all the way, which the evidence of these button holes suggests was the original form of the jacket.
The bodice is decorated in the embellishment style of the period, called passementerie, that began as a way to adorn furniture and later expanded to clothing using elaborate trimmings, lace, beading and fringe to fit a maximalist visual aesthetic of the period.
The decoration of both the bodice and jacket are very interestingly following both graphic and botanical trends, with the uses of black velvet and fringe accompanying black lace and small white and black beads creating a vine like pattern along the neckline of the bodice.
I wanted to highlight the majority of my work at ZTC which was mounting the Victorian bodice. I created a custom padded mannequin including a jersey cover, custom shoulder and arm extensions, and a calico cover to polish the look when the bodice is on.
I had to use both hand and machine stitching to achieve the overall results. I used fosshape for the shoulder and one one arm extension (thank you Ania for your help with this new material!). I had constant guidance from Jamie my main mentor (Image 3) on how best to complete each step and grew a love for curved needles, which I had not had the pleasure of working with before this.
Here’s a very brief summary of the overall process!
Image 9: This is the original mannequin that is paper mache base and calico covered. The mannequin was even smaller than the bodice so there was room to build up a shape.
Image 10 & 11: This is the removal of the breast area to establish a new bust point. Modern bust points are typically not located in the same place as ones of historical dress so the form needed to be neutralized so that I could pad in an appropriate shape in the chest region. We used the bodice to establish a new bust point that would best serve the costume. I used card stock and a staple gun to create a base for the new hole in the mannequin and then hand sewed the mannequin closed so it had a clean finish for padding.
Image 12: finished restructured mannequin ready for padding.
Image 13 & 14: What you see: a finished padded mannequin with fosshape shoulder extensions to best accommodate the style of bodice which hung barely of the top of the shoulder
What you don’t see: the layers upon layers of batting that was used to achieve these various body shapes, which were all hand stitched into the mannequin. This is not completely finished however, the next image shows a fully covered mannequin that is ready to be covered, I made a front and back covering to smooth all of the individual padding for the Jersey cover with smooth edges so it has a cohesive shape overall.
Image 15: A side shot of the mannequin with the custom jersey cover which was made by pinning the jersey onto the padded mannequin and creating a tight fitting shape that was then machine stitched together and hand sewn on the side and neck and stapled onto the bottom to create a seamless and smooth look over the whole mannequin. Some additional padding was needed to fully finish this step on the shoulders.
Image 16: the finished mannequin with a calico cover on the top which was made with a similiar process or the jersey cover with emphasis on a smooth and taut finish. This technique creates a smooth and polished look for the mannequin where it will be viewed and not covered by the costume. You can also see the two different arm extensions I did, one was a covered fosshape, and the other was a padded and both machine and hand stitched extension. The color of them blends I with the bodices lace nicely so they aren’t visible, but they add nice support to the sleeves which are so beautifully adorned with lace, ribbon, netting, and embroidery.
Image 17 & 18: Two separate views of the finished mannequin with the bodice fully mounted. This mannequin will be a part of the studio to be used in costume mounting workshops. I also created a full guide of all the techniques I used throughout this process that will give mounting students both written out and visual instruction on a full costume mount specifically focused on historical dress.
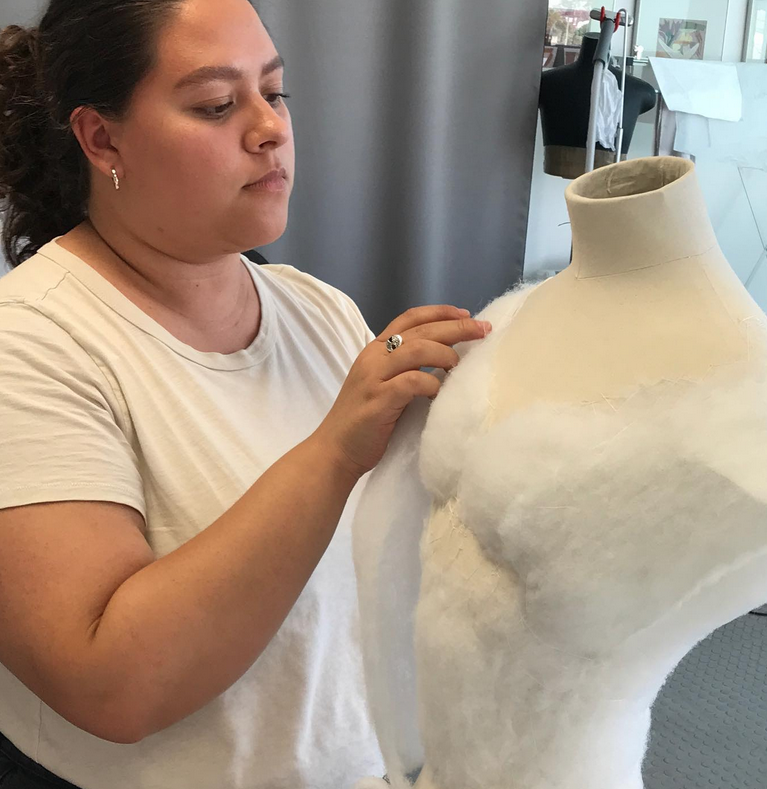
Image 1 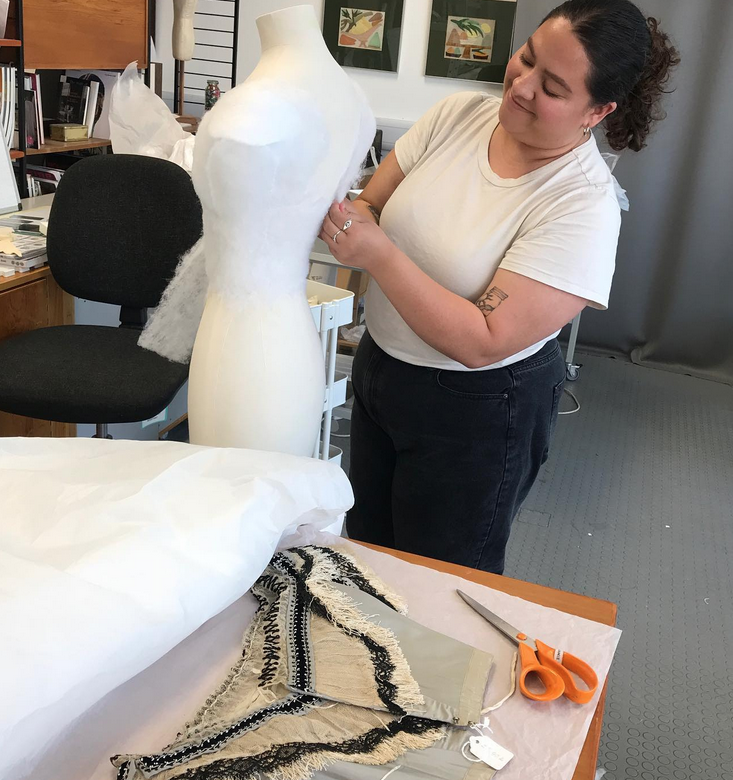
Image 2 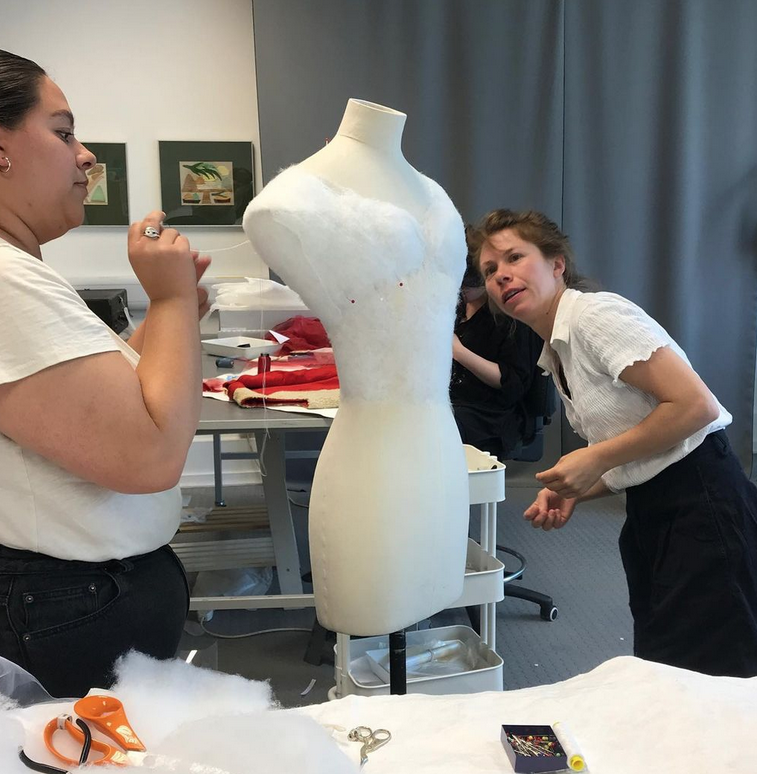
Image 3 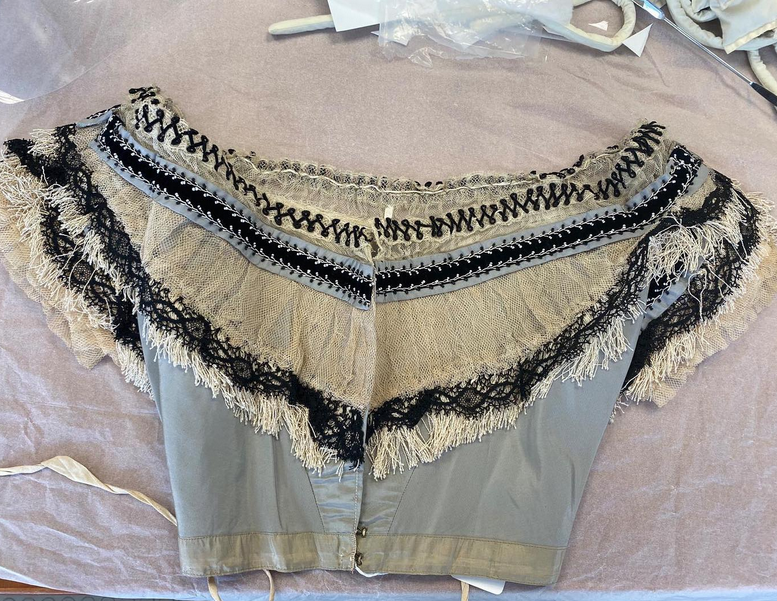
Image 4 
Image 5 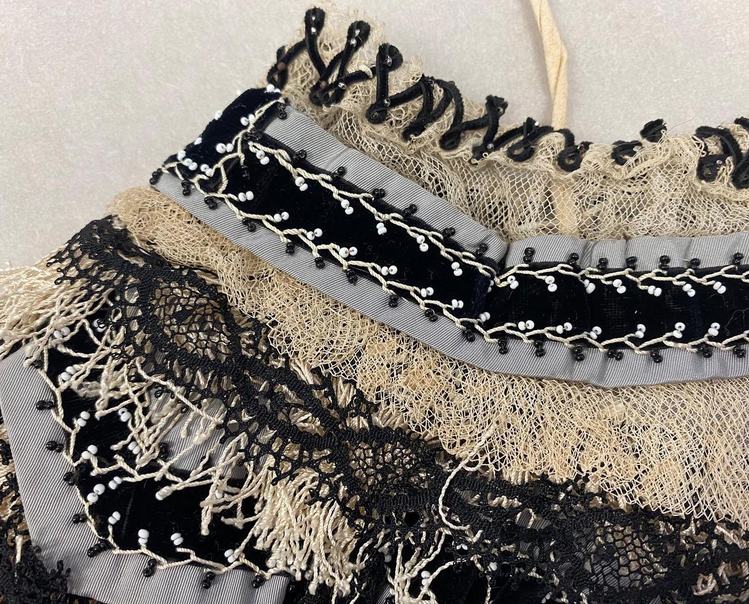
Image 6 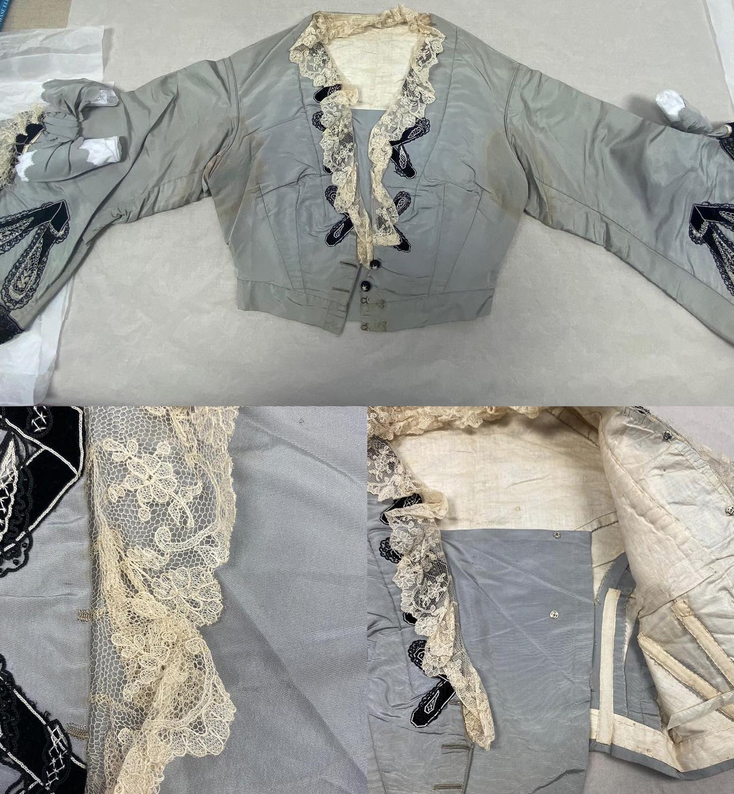
Image 7 
Image 8
(MET collection, public domain)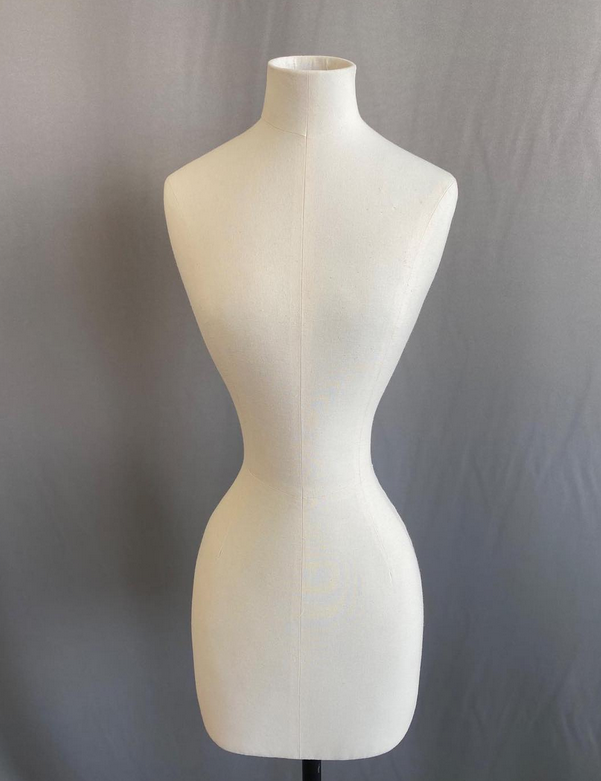
Image 9 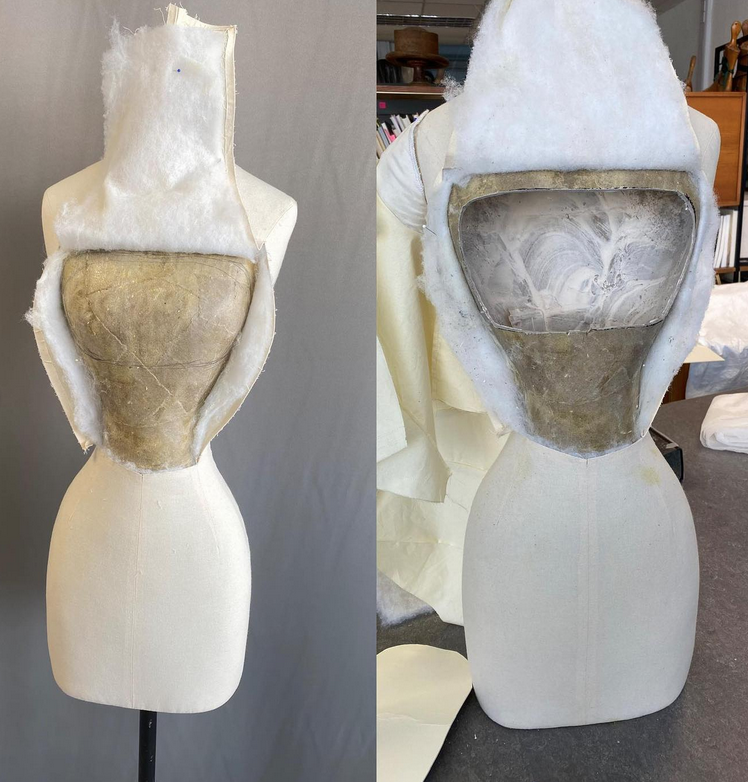
Image 10 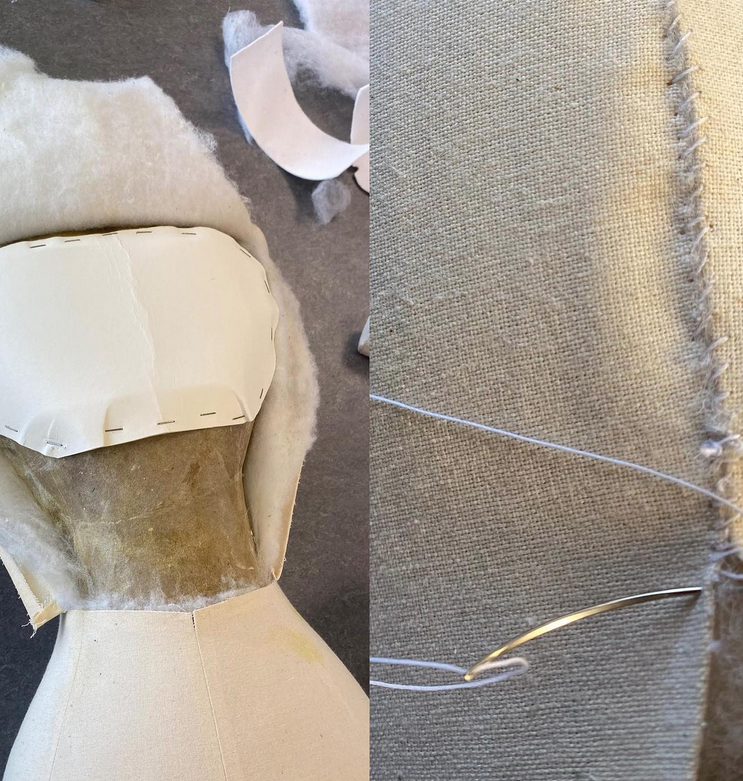
Image 11 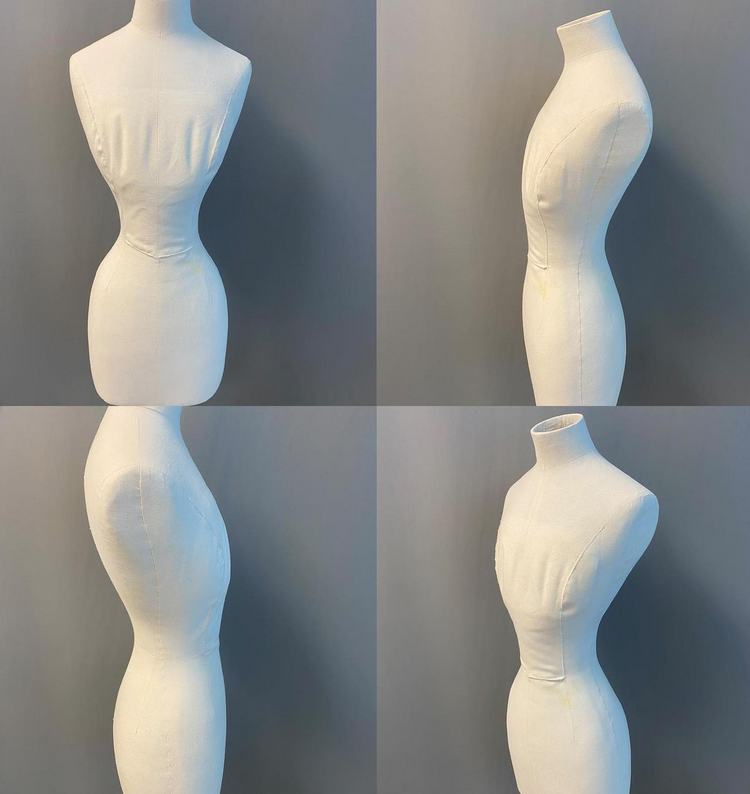
Image 12 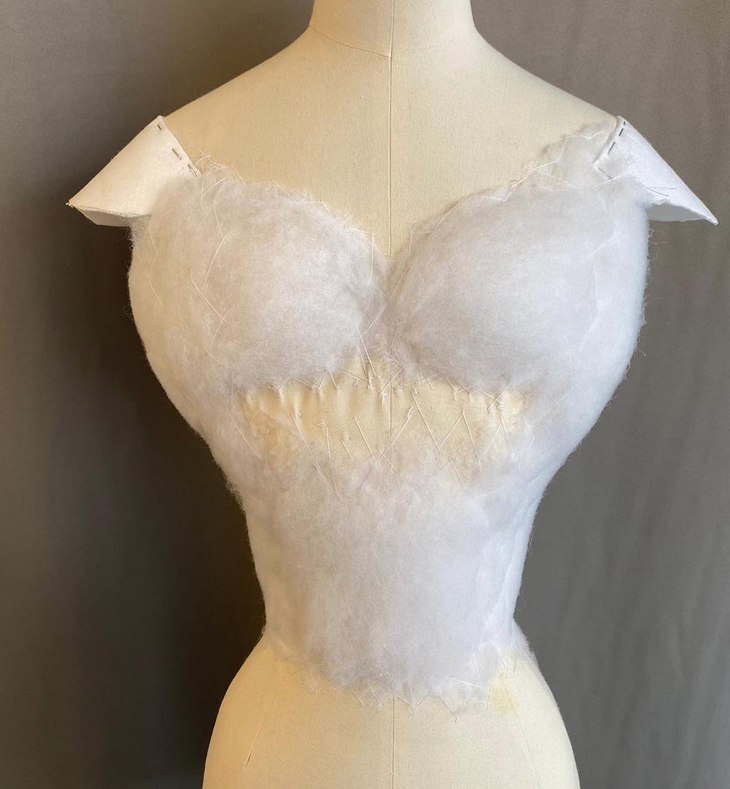
Image 13 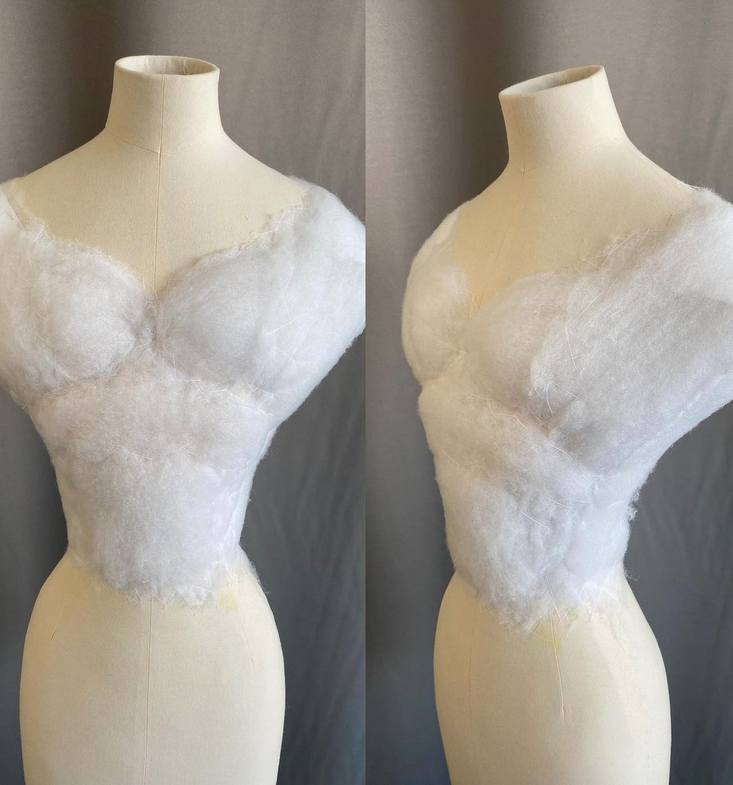
Image 14 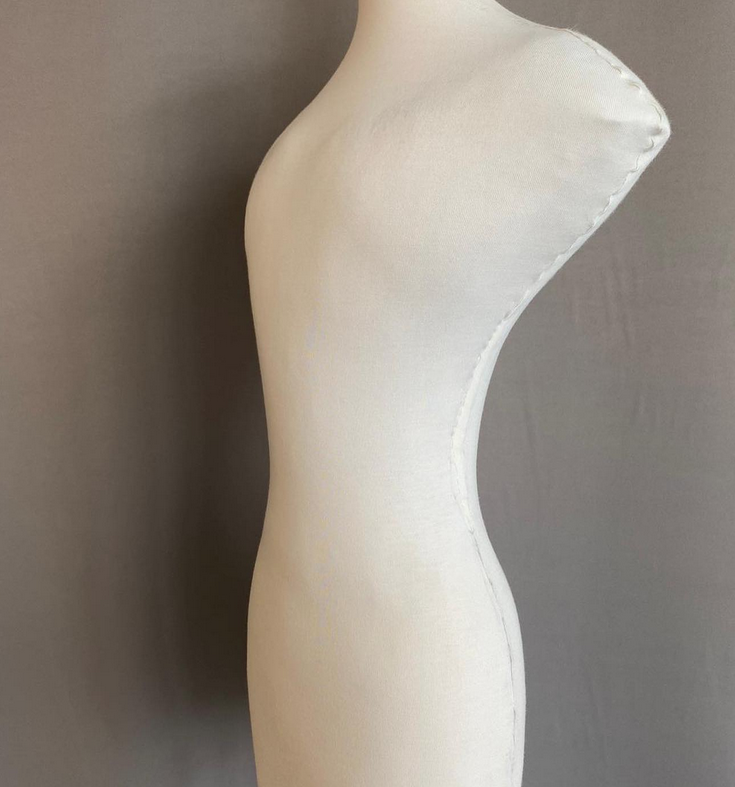
Image 15 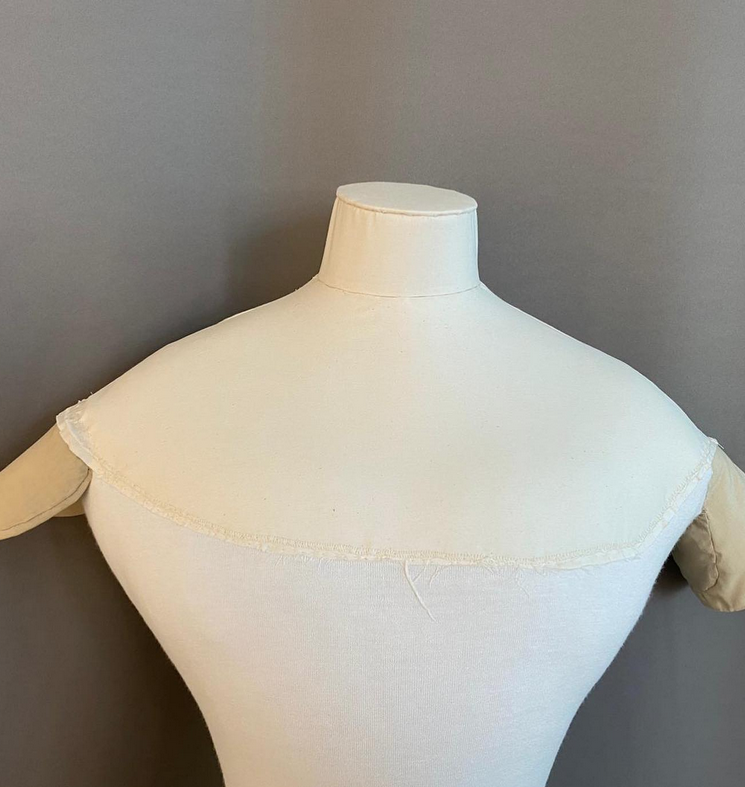
Image 16 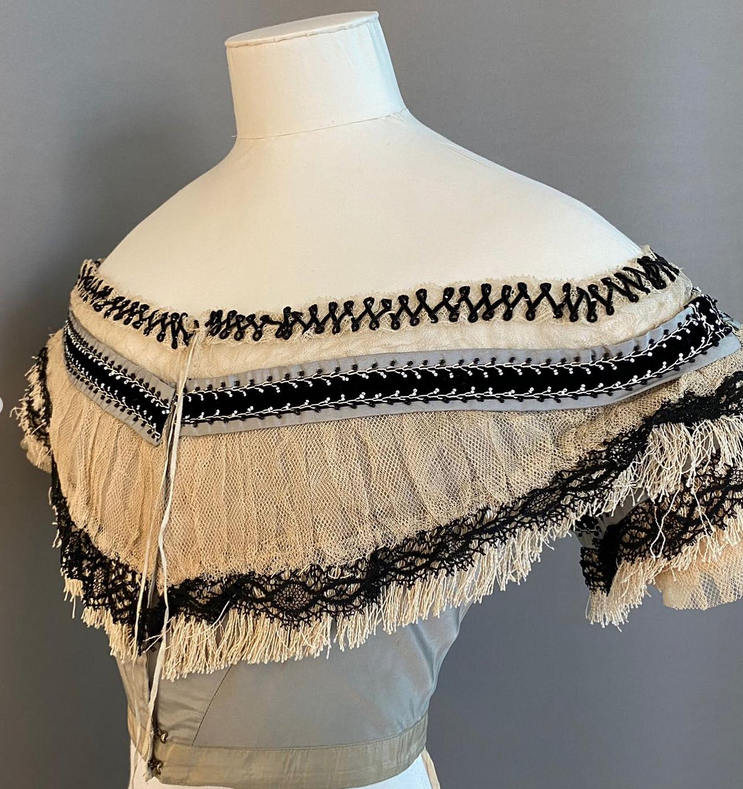
Image 17 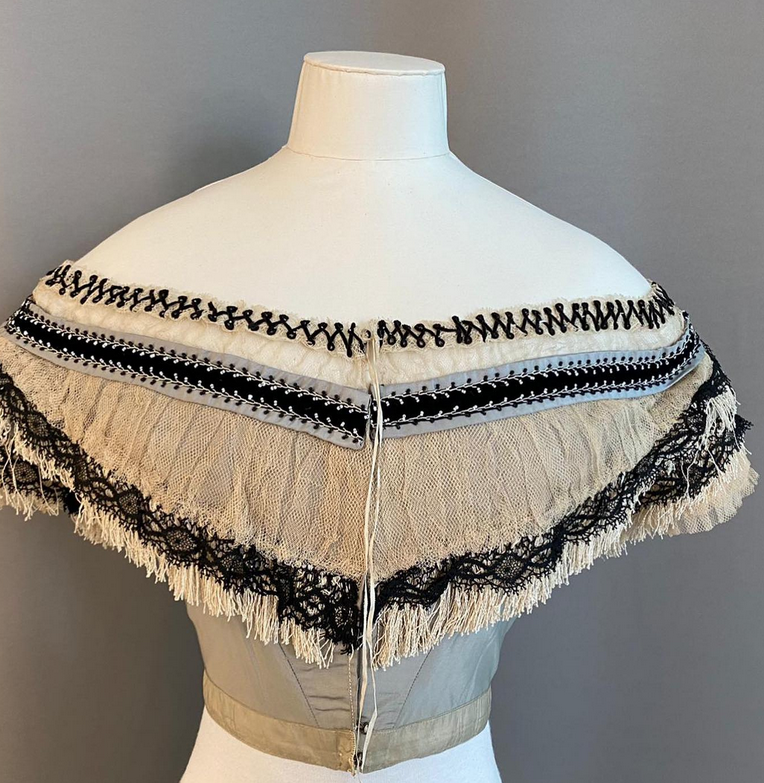
Image 18