Conservation of Hats Through an Intern’s Eyes by Emma Hartikka
Tricky Treatments Unfolding
The half way mark of my internship is now passed. I have already learned a lot about textile conservation and different treatments used. Through frustrations, problem solving, little successes and massive help from my colleagues, the secrets of some of the treatment options have been unfolding, little by little. In this post I will share with you some of them. Here we go:
Surface cleaning
One of the first conservation treatments an object goes through after documentation and condition checking is often surface cleaning. All the hats were quite dusty and had other kinds of dirt or loose particles on their surface as well. Dust may appear to be quite a harmless substance (think of those cute little fluffy balls and dust dogs), but really it is like poison for the textile, speeding up the aging process and leading to damage. It can attract vicious insects and mold, cause color changes and acidity, break down fibers and weaken structures. Therefore, surface dirt must be removed as far as possible. In the case of the Worthing hats that has meant vacuuming, sponge cleaning and swab cleaning.
Every hat was vacuumed with a small vacuum head and low suction to get rid of any loose particles. Sometimes a small brush was used. If the object is particularly fragile it can be vacuumed through a net to protect it. A handy set of small vacuum heads can be seen in the picture.
Sponge cleaning can be used when trying to remove more sticky or ingrained dirt. Grainier smoke sponges or more delicate make-up sponges can be used. What a useful tip when cleaning straw or ribbons!
Humidification
Humidification, i.e. slow and controlled application of humidity to the fibers, is a good method when one desires to relax and straighten out an unwanted crease on a ribbon, reshape a deformed brim of a straw hat or make squashed fabric flowers alive again. However, one must be careful not to forget testing the colorfastness or to make the object too wet as these can have disastrous effects such as water stains or discoloration. Just imagine a hat with a water-soluble ornament for example, melting in your hands and the colors running all over – stuff of nightmares! That is why testing, monitoring and slow progress are key words to success.
There are a few different methods of humidification. The ‘sandwich’ method was used to humidify ribbons. Instead of wheat buns, cheese and ham, this involves wet blotting paper (used as the source of humidity) and a so called semi-permeable membrane placed between the blotting paper and the textile, letting the humidity slowly access the object. The ‘sandwich’ is covered with plastic film to prevent the humidity escaping.
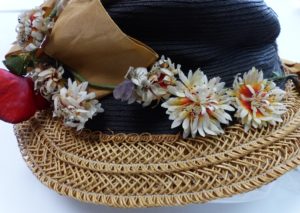
So called ultra-sonic humidifier is used for localized humidifying. It produces fine vapor which I took advantage of when I had to straighten a misshaped lace trimming or squashed flowers (two flowers from the right are already humidified).
Netting
Finally, as I promised in my last post, we come to my third treatment example, netting. Sometimes the surface of a textile can be so damaged and fragile that support stitches wouldn’t be enough or they might even damage the textile further. In this case a protective overlay of nylon net or silk crepeline may be applied. This was the case with the silk linings of many of the Worthing hats. The linings had obviously suffered from repetitive use, sliding hats on to one’s head and then off again. On top of that, the linings will have to be protected against potential abrasion between the lining and museum storage supports, exhibition mounts and handling.
Therefore, the decision was taken to cover some of the most fragile linings with anet overlay. And off I went, starting my first netting process ever. As it soon turned out, I wasn’t exactly born with a piece of nylon netting in my hand… In order to properly protect the underlying lining, the overlying net has to fit the shape of the surface well, being not too tight but not too loose either. Also, it is important to use the net in the correct grain orientation. I really struggled with perfect tensioning of the net into the 3D shape of the hat. After many hours of sweat, blood and tears shed, I finally managed to finish my netting. It is not the most perfect example of netting around but I would certainly win the prize for the longest netting process ever in the history of Textile Conservation. What a learning curve – I am actually quite happy for it!
Now, ready for new interesting experiences in the wonderful jungle of textile conservation treatments!


